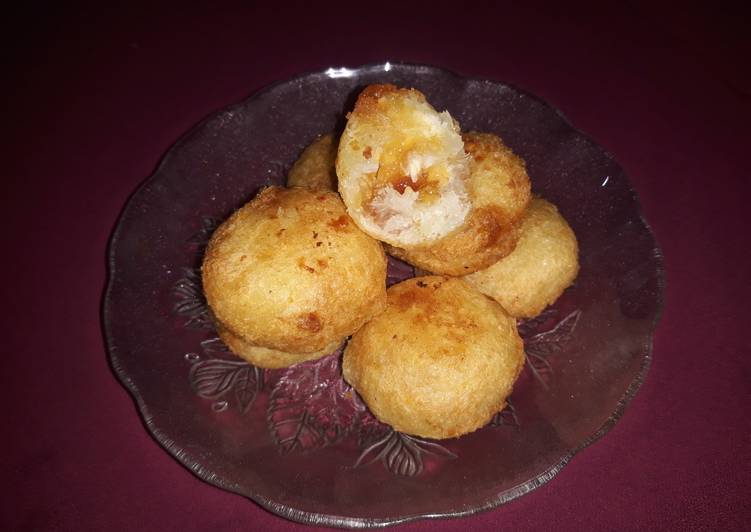
Olahan Singkong (Jemblem)

Olahan Singkong (Jemblem)

Olahan Singkong (Jemblem) foto resep utama

Olahan Singkong (Jemblem)

Hanya menggunakan 2 bahan tapi rasanya mantul.

Bahan-bahan

  1. Singkong
  2. Gula merah

Langkah

  1. Kupas dan cuci singkong hingga bersih, potong-potong lalu rebus. Setelah matang, tiriskan terlebih dahulu

  2. Tumbuk singkong (saya menggunakan uleg-uleg yang dilapisi plastik).

  3. Ambil singkong yang sudah halus, pipihkan dan isi gula merah. Lalu bulatkan lagi.

  4. Goreng hingga keemasan.

Fluffy Souflly Omelette

Fluffy Souflly Omelette

Fluffy souflly omelette foto resep utama

Fluffy souflly omelette

dapet resepnya daru you tube
hihihi mumpung di kulkas banyak telur bikin aj dadar telur yang berbeda dri biasanya 😁😁😁

Bahan-bahan

  1. 2 butir telur
  2. 1 sdt gula pasir
  3. 1/4 garam
  4. sedikit margarine

Langkah

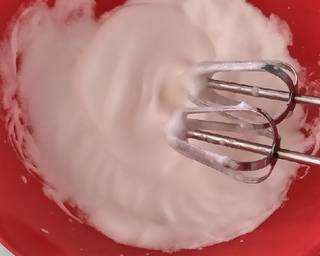
  1. Pisah kan kuning dengan putih nya,putih + gula pasir kocok sampai putih kaku

    Fluffy souflly omelette langkah memasak 1 foto
  2. Kuning telur+garam kocok lepas kemudian campurkan pada kocokan putih telur aduk sampai merata

  3. Panaskan teflon kasih sedikit margarin (api kecil)tuang adonan kedalam teflon tutup kurleb 2-3 menit lalu lipat perlahan panggah bagian yank belum matang lakukan dengan sabar dan pelan sampai matang menyeluruh

  4. Setelah matang angkat dan sajikan dengan saus tomat hemz yummy lembut bngt 🥰

    Fluffy souflly omelette langkah memasak 4 foto
Bubur Kacang Hijau Sagu Mutiara

Bubur Kacang Hijau Sagu Mutiara

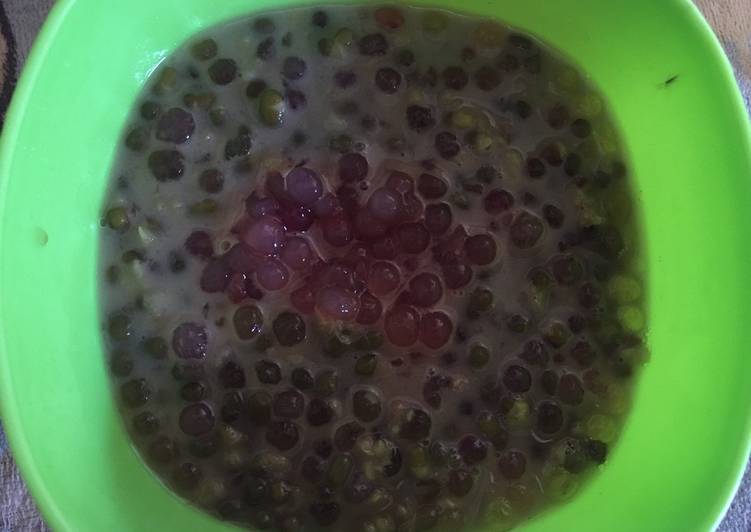
Bubur kacang hijau sagu mutiara foto resep utama

Bubur kacang hijau sagu mutiara

Lihat resep mbak #FrielinggaSit yang in kepingin buat. Sudah beli bahannya 2 minggu lalu..baru ke sampaikan hari ini.🤗🤗🤗
Saya ganti santan dengan susu kental manis.

#Recook
#FrielinggaSit
#HappyCooking

Bahan-bahan

  1. 1 bungkus kacang hijau (harga 5000 d Papua)
  2. 500 g sagu mutiara
  3. 1 buah gula merah (geprek)
  4. 2 sdm gula pasir
  5. 4 gelas air untuk masak sagu mutiara (gelas sabun yang sedang)
  6. 7 gelas air untuk masak kacang hijau
  7. 2 lembar daun pandan
  8. Pelengkap
  9. Secukupnya susu kental manis

Langkah

  1. Rebus 4 gelas air hingga mendidih. Masukkan sagu mutiara & daun pandan. Masak selama 20 menit. Matikan kompor, tutup diamkan semalam. (Saya masak jam 22.00). Pagi masak lagi sagu mutiara yang sudah sebagian berwarna bening selama 15-20 menit. Diamkan di dalam panci hingga dingin, tiriskan.

    Bubur kacang hijau sagu mutiara langkah memasak 1 foto Bubur kacang hijau sagu mutiara langkah memasak 1 foto
  2. Rebus kacang hijau hingga pecah (saat pecah air berkurang bisa tambah air matang). Masukkan gula merah, gula pasir, & daun pandan. Masak hingga gula larut (cicipi rasa klau kurang manis bisa tambah karna saya pakai susu jadi tidak tambah gula). Masukkan sagu mutiara, masak hingga mendidih. Angkat & sajikan dengan ditambahkan susu kental manis.

    Bubur kacang hijau sagu mutiara langkah memasak 2 foto Bubur kacang hijau sagu mutiara langkah memasak 2 foto
  3. Selamat menikmati.😊😊😊

SOP KACANG MERAH A.k.a Sop Brenebon

SOP KACANG MERAH A.k.a Sop Brenebon

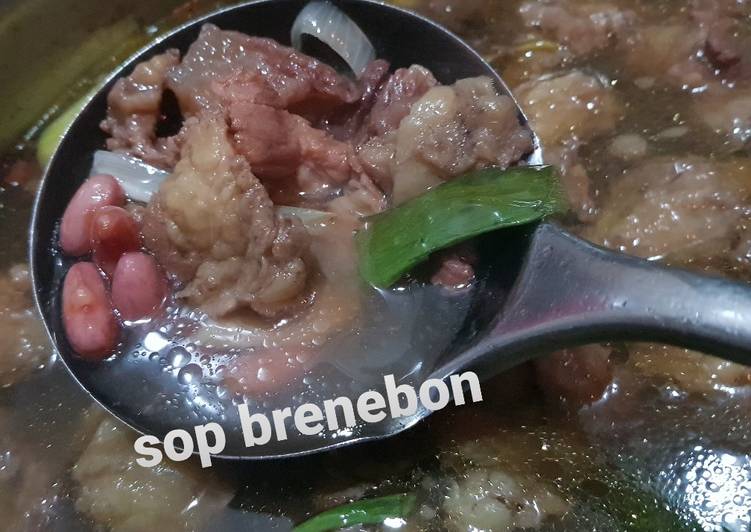
SOP KACANG MERAH a.k.a Sop Brenebon foto resep utama

SOP KACANG MERAH a.k.a Sop Brenebon

Sop kesukaan Keluarga, titip simpan resep disini. Semoga Bermanfaat

Bahan-bahan

15 porsi
  1. 500 gr Kacang Merah Kupas
  2. 250 gr Tetelan/Sandung Lamur Sapi
  3. 2 L Air
  4. Iris Bumbu
  5. 7 Siung Bawang Merah
  6. 5 Siung Bawang Putih
  7. 1/2 Bawang Bombay
  8. 3 CM Lengkuas
  9. 3 Batang Daun Bawang
  10. 1 Buah Tomat
  11. Bumbu Lain
  12. 3 Lembar Daun Salam
  13. 5 CM Kayu Manis
  14. 1 Buah Gula Aren ukuran Kecil (sesuai selera)
  15. 1 Sachet Kaldu Sapi
  16. Garam

Langkah

  1. Rebus Tetelan Sapi yang sudah dicuci bersih sampai empuk (saya pake presto 10 menit)

  2. Didihkan Air di Panci terpisah, masukan Kacang Merah, Bumbu Iris dan Bahan lainnya. Kecuali Tomat dan Daun Bawang masukan terakhir.

  3. Setelah Kacang Merah Empuk, tambahkan tetelan sapi yg sdh di masak tadi. Tambahkan Garam. Masukan Tomat dan Daun Bawang Iris. Tes Ras

  4. Siap Dinikmati dengan Sambal Terasi dan Ikan Asin Peda Goreng/Pepes. Maknyuuus

 Choux Au Craquelin  Cream Puffs

Choux Au Craquelin Cream Puffs

 Choux Au Craquelin _ Cream Puffs

I swear that this flavor is so good that you can have me if you don't ;)), why not try it?

First, take two laying lion eggs. Honestly, it's still wet.

100% Pure, authentic Lion egg

Crack into the vomiting chicken. :))

I'm sure you don't have a lion that lays eggs and a chicken that vomits egg white. (Sucks to be you hehe) Pour the egg yolks into a bowl and mix with 60g sugar.

Use a whisk and mix very well so that the sugar dissolves nicely in the yolk.

Don't mix it too hard so that it won't become a disaster like you when you see your crush. : D Then add 25g of cornstarch. Mix until fully incorporated.

As you can see, the sugar is not completely dissolved here. Mix until light yellow as shown.

Show me when you're done. I'll check it. :))

Pour 240ml of sugar-free milk into this brilliant, brand new Korean pot. It was given by my friend, Phan Anh (?) hihihi You can't cook this recipe without using this pot. Ever ùwú I'm kidding. (and I don't understand what's in here?? choux cream is going to happen??? someone help me pls - translator angel) Heat the milk in pan to 80-90 degrees.

Use your hand to check if it's hotter than Satan's butt, then we're done 🥰  Please don't dip your whole palm in it, you're being stupid.

Pour the milk into the egg mixture. Mix while pouring to prevent the egg from cooking.

After everything is combined, pour into a pot. Red is my lucky color so I changed my pot. :)) Ddu-whoosh!

Make sure to stir well so it doesn't get lumpy and doesn't burn your butt - I mean below.

Mix until thoroughly cooked and looks like this.

Now put it in a bowl. Use a plastic wrap to cover the surface of the cream completely or else it will dry.

Chill in the fridge for 1-2 hours. If the cream dries, then it's okay.

After cooling the first cream mixture, beat 180ml of whipped cream in another bowl.

Don't mix too much soft peaks :((  You'll get separated and divorced.

FAILED CREAM MARRIAGE = ASEXUAL CHOUX CREAM

(oh gods, bless this man)

Take out the cream from the fridge and beat for a minute until it's smooth.

Guys, it's not necessary to use mixer. You can just use a spatula, if you don't have one. : ) Make it as smooth as my dad.

Plop.

Plop.

Then use the mixer in the lowest setting mix for 30-40 seconds to combine, okiee~?

Translator Angel: If you're mixing using hand tools, just mix until the shape of the dough dropping from the spatula is in an inverted triangle.

Please don't mix too much - we don't want a cream divorce! Well, you can still use a spatula combine them tho.

Transfer the cream to the pastry bag and let's start with the crispy exterior, yay~!

It's super easy~. Just mix 60g of unsalted butter at room temperature with 50g of sugar.

Combined, not melted, okieee~?

You will have to mix for years for the sugar to melt :((

Add 60g of all-purpose flour and mix until completely combined.

Don't worry, the sugar will eventually melt when we bake it.

Roll until 2-3mm thin, no need to be super thicc.

Place it between two sheets of parchment paper.

Leave in the freezer and let's start with the dough.

Let's get this bread!

First, add 130ml of water.

50g of unsalted butter.

And 1/4 teaspoon of salt.

Then, turn on the magnificent Korean gas stove. Oh right, you don't have one :(( Melt the butter and bring mixture to a boil.

Remove from the stove as soon as it starts to bubble.

Add 70g of all-purpose flour and use a spatula to mix together.

Press and rub against the edges of the pan if mixture is still lumpy.

When there are no butter juices left, put the pot back in the stove on medium heat for 60-90 seconds.

Cook until sticky (for non-stick pot). Or until softer than before.

The dough will dry out if cooked for a very long time.

Leave to cool off for 10-15 minutes.

While I wait, I'll pretend to be cute with the kitty cat. :))) Sigh.

Back to work! Let's break two fat eggs into the mixture.

Mix well. It will be a little lumpy at first tho.

Don't worry. It will be as smooth as silk in a few minutes. :DD If the dough is a little dry, you can add some egg whites. (The leftover ones from the beginning that were vomited by the chicken, remember?) Pour little pieces at a time,  but if you use fat eggs like I do, then it should be fine.

Now transfer it to a pastry bag and let's get started!

( Me: *pikachu face*)

(guys, I can't-)

If you want them to be more beautiful, you can draw circles on the parchment paper.

Remember to turn the pencil-marked side down. Or else it'll taste like graphite.

After the pipe, remove the crispy exterior we made earlier from the freezer.

Use a circle cutter to mold them out.

Make sure this circle has to be the same size or bigger than the cream for it to be beautiful.

The dough looks a bit flat here but it will rise later if done correctly so don't blame me :((( So satisfying to watch ;-;

Always pre-heat your oven 15 minutes early when baking using the same recipe temperature.

So kawaii~

If this is your first time baking, start with 190 degrees Celsius for 10 minutes, then check if the color is golden like mine.

If so, then lower the temperature to 180-175 for 15 minutes, depending on your oven setting preferences.

Wait for it to cool and then make a hole at the bottom to fill them with the cream we made earlier.

Make sure that it is COMPLETELY cold. Otherwise, the cream will melt.

Cold cream filling is superior, of course :))

I'm annoying so I'm going to make a kitty here. : )))

So cuuuute~!

You can't really eat it so I'll just make a fake version :< Use melted chocolate on crispy surface for decoration. EASY!

Wow, soooooo many kitty cats uwu, I'm terrible at drawing, it's still cute tho.

The successful choux will look so dry and hollow. (like you) Looks very YUMMYYYY~

Crooked cat just because there's no kiss :(((((

The exterior is so crispy and sweet. The dough is greasy and the filling is a star in your mouth. OMG! It's so creamy and indulging ;-; perfect for warm days.

The longest video I made to date. I took three sleepless nights because it's the rainy season right now.

(Translator Angel) I also got tired making the caption for English subs. : ((( Y'all better pay me for my first time.

I can hear the crickets late at night to the birds chirping at dawn. : ((( 
Caramel Bread Popcorn Recipe

Caramel Bread Popcorn Recipe

Caramel Bread Popcorn

Hello hello, sorry because I upload the video late for one day :))). So I will upload another super yummy video (like me) on Wednesday First, we need 2-3 slice of bread (I made this bread myself, trust me), a little more thicker bread will be better.

Cut the bread into small square pieces, but don't cut it too small like your crush's love for you, as the tip of the big toe is fine They often compare with the finger but I found it too small so I choose toe Do you like sandwich and me? If you like it, please leave a comment and then I'll make a tutorial video :) After cutting the bread, put a frying pan on the stove

Then put the bread cubes into the pan

Roast it until crispy. It will take 5-10 mins

Don't do like me. Your bread will fall and it will die

The bread is dried, crispy. The outside should be a bit golden. The inside is a bit soft but that should be okay Next is the caramel, please use a non-stick pan

Use this cute spoon to add 3tbsp of sugar and 1tbsp of water

Heat your caramel on medium heat. When you heat it, don't stir or it will be broken like the love story of you and your crush.

Heat until golden NOT golden brown

When the sugar is golden, put 1tbsp of butter, pour 3tbsp of non-sugar milk Please be careful, I'll be very painful if you get burned, even more painful than getting dumped by your crush.

After you put butter and milk, stir it constantly

Put the bread into the caramel. `

Spread out to cool the bread. It will be soft at first but when it cools down, it'll be very crispy This is perfect for breakfast with some milk, not as perfect as me, though Follow my facebook Nguyễn Duy Hoàng!!!

Korean Braised Chicken - Andong JjimDak Recipes Tutorial

Korean Braised Chicken - Andong JjimDak Recipes Tutorial

Korean Braised Chicken - Andong JjimDak


It rains a lot recently, so I got into online grocery shopping. Life is way easier with home delivery.

Free shipping - what else can I ask for

The Andong Jjimdak is a popular dish in Korea. You can adjust the spices and ingredients to your taste and it still turns out superb.

I can't believe I can online shop for proteins and veggies as well as sweet stuff for baking Anyway let's COOK!

This serving is for 2 people. But to me it's one serving for Nino :> Peel and wash all veggies. Then cut it to the size of your preference.

I use 1 sweet potato, 2 potatoes and 1 carrots, cut in 2-2.5cm thick pieces.

Not too thin or thick.

Laugh all you want :< But you'' hurt hurt my little soul lol. I'm really dull with savory dish, like my stupid knife.

Not feeling fancy here.

Just focus on the hand then :> Forget the knife :>

Leave the veggies. Watch me ship up magic sauce.

1 table spoon Korean chili powder + 1 table spoon brown sugar plus one tea spoon (baby spoon :>) ginger and 2 table spoon garlic, all minced Two table spoon sesame oil and 1/2 baby spoon salt. Sesame oil is a must in Korean dishes.

*Fancy spice rack on display. Too bad you dont have it.

6 table spoon soy sauce plus 2 table spoon corn syrup which can be replace with 1 and a half table spoon sugar I told you my spice corner is just dazzling fancy.

Finally, add pepper depending on you taste.

Party mix hey hey

JK just mix the spices together and leave it aside.

Soak 50g of Korean glass noodles in 20 mins

You can use any other types of glass noodles.

Turn on the sparkling Korean stove!

Put just enough oil on a non-stick pan to cover the bottom.

Fry 500g chicken. I use chicken thighs because I love treating myself with juicy tender meat :> Just pan fry until the chicken turn light golden on the outside.

Pan fry each side around 4-5 mins on medium heat

You just need a golden glaze on the outside ehh.

Put the chicken into a clay pot. I use clay pot because I have no other pots nicer than this one. Still better looking than yours I bet lol.

Clay pot also retains the heat really well. Perfect for cooking this dish.

Add veggies. You can use mushrooms and cabbages as well.

Pour the sauce from my ADORABLE CAT BOWL :))

you still dont have cat bowl I am just very sorry for you lol. It sucks to be you :) Put 500-700 water until it covers the meat and veggies.

Boil on medium heat for around 15 mins

While waiting chop 1/2 onion and 1 green chili

Cooking time actually varies depending on the pot and heat. Usually after 20-30 mins the meat is cooked and tender Green chilis taste different, kinda like paprika.

After 15 mins when the water reduced. Put in onion and chili Continue to cook for 7-10 mins. Remember to stir so that you won't burn the dish from underneath.

Take out the glass noodles. Remove water.

After 7-10 mins when the water continues to reduce, add glass noodles to the pot.

Reduce to low heat and cook for another 2 mins.

Meanwhile chop some spring onion to your preferred size and quantity.

Watching rookie me cutting like this annoys me to the very core > 00:06:18,380 Chop one red pepper, you can add dry chili flakes, depends on your spiciness tolerance.

After 2 mins, add the spring onion and chili. Then done!

Yaahh this is soooo sesciii. HD quality food porn.

Glass noodles are chewy and savory as absorbed from the thick sauce. My favorite food  00:06:51,680 Look how tender the chicken is!! Incredibly tasty and fragrant.

THA CHICKEN LOOKS THICCCCCCC

This dish is as delicious as like your crush, and just almost as me tho.

Pussy cat lovesss this. But spices are not good for cats so he can smell all he wants lol.

Treat yourself this weekend by making this :> Don't forget to share and subscribe or my cat will haunt your dreams. Thank you very much :>